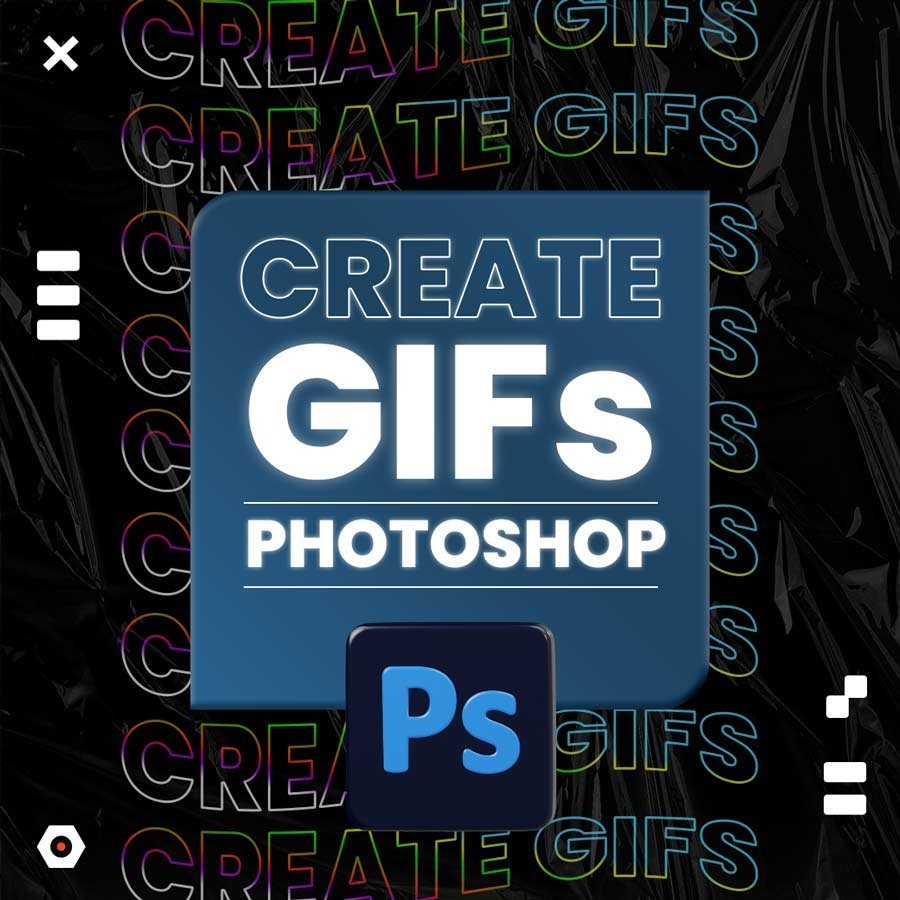
Master the Art of Creating GIF in Photoshop in Just 5 Minutes!
in Graphic design, Tutorials on August 14, 2024How to Create Stunning GIFs in Photoshop: A Beginner’s Tutorial
Ready to create amazing GIFs with Photoshop? This guide will show you how to create stunning animations step by step, even if you’re new to design or just starting. Photoshop is a powerful tool, but it’s also easy to use, so don’t worry if you’re not an expert. We’ll help you through the whole process, from choosing the right images or videos to turning them into an eye-catching GIF.
You’ll learn how to add cool effects and seamless transitions to make your GIF stand out. We’ll also show you how to keep your file size small, so your GIF loads quickly without losing quality. With our simple tips, you’ll be able to create GIFs that will grab attention and leave a lasting impression.
So, open up Photoshop and get started. It’s time to explore the exciting world of GIFs and learn about creating GIF in Photoshop to take your designs to the next level!
Understanding the Basics of Creating GIF in Photoshop
Before we begin, it’s important to understand why Photoshop is the best software for creating GIFs. Unlike many online tools that limit your creative options, Photoshop gives you full control over every aspect of your GIF. You can edit each frame, add layers, and even add effects that aren’t possible with simpler tools.
Why Choose Photoshop for GIFs?
Full Creative Control: You control each frame and layer.
High-Quality Output: Photoshop allows you to maintain image quality.
Endless Possibilities: From basic animations to complex visual effects, the sky’s the limit.
According to a survey by G2, 85% of graphic designers prefer Photoshop because of its flexibility and advanced features when creating animations, including GIFs.
Step-by-Step Tutorial For Creating GIF in Photoshop
Let’s start with the basics: creating a simple GIF from a sequence of images.
Step 1: Prepare Your Images
Drag and drop the images you want to use in your GIF. Make sure they are in the correct sequence.

Open Photoshop and go to File > Scripts > Load Files into Stack. This will import your images as layers.
Step 2: Create a Timeline
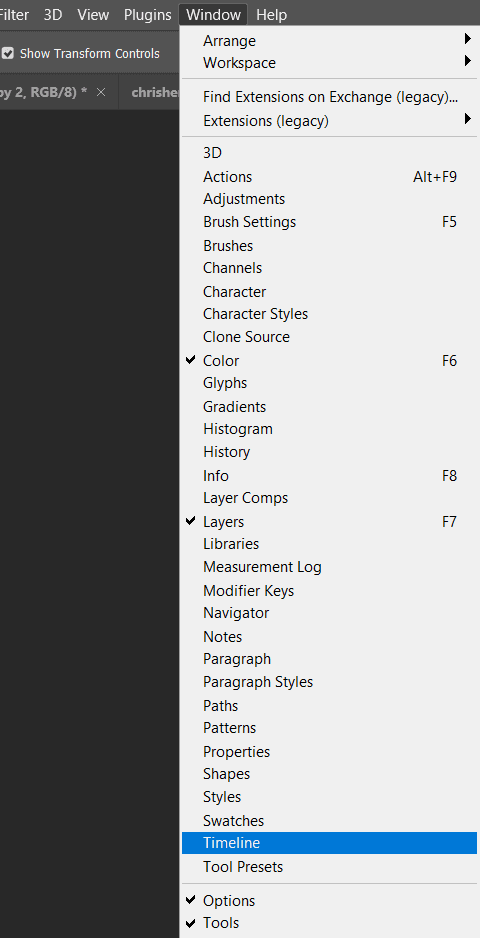
Go to Window > Timeline. Click on “Create Frame Animation.”
In the Timeline window, you’ll see each image as a frame. Drag and drop to reorder them.
Step 3: Creating Animated GIF

Select the layer which you want to animate then make the copy of the selected layer by pressing CTRL+J.
Trim the path of both layers and ensure a gap between them to create the blink effect. Trim the top composition area according to the timing of your GIF.
Step 3: Creating Advanced Animated GIF
Adjust the keyframes as shown in the video to create an animated gif. By following this method you can turn your basic graphics into interesting visuals.
Step 4: Preview and Save Your GIF
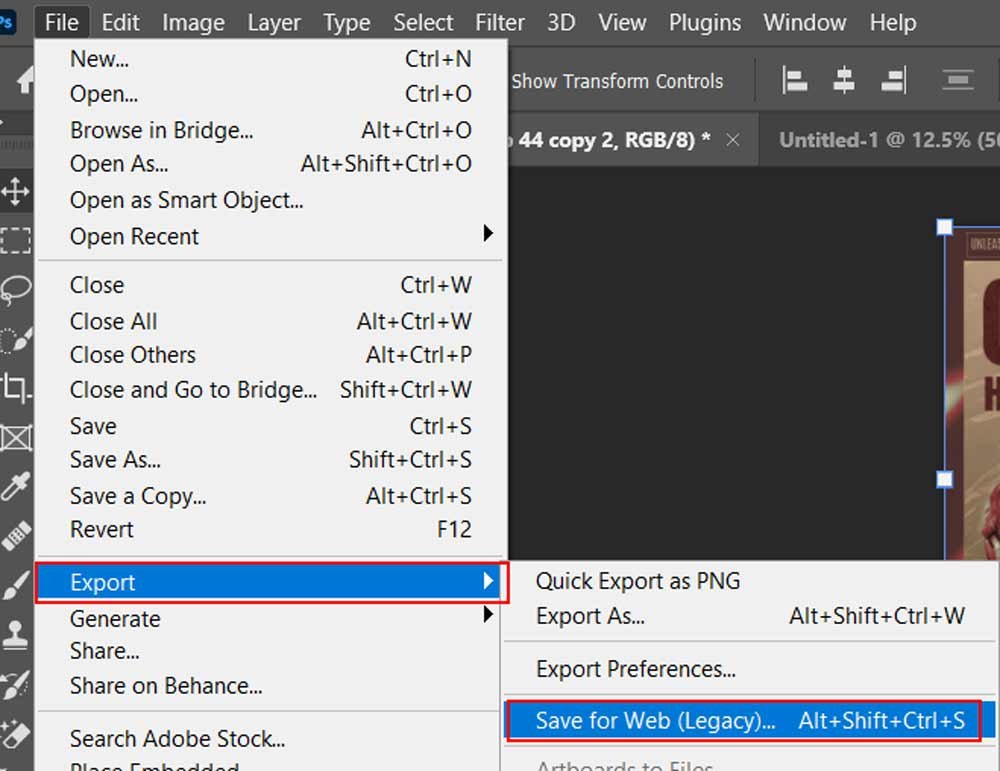
Click the play button in the Timeline to preview your GIF. Once satisfied, go to File > Export > Save for Web (Legacy). Select GIF as the format, and then click Save.
Advanced Techniques for Creating Complex and Visually Striking GIFs
Once you’ve mastered the basics, it’s time to get creative. Photoshop offers many advanced techniques to make your GIFs more appealing.
Using Layer Masks for Smooth Transitions
Layer masks allow you to blend images easily. This technique is beneficial for creating GIFs where one image transitions into another.
Animating Text and Graphics
Add text layers and animate them using the timeline. You can make text appear, move, or fade out, adding a dynamic element to your GIF (as shown in above video)
Stat Insight: GIFs with animated text are 40% more likely to be shared on social media, according to a study by Social Media Examiner.
Optimizing GIFs for Web and Social Media Platforms
Creating a stunning GIF is just the beginning. To ensure your GIF performs well online, you need to optimize it for different platforms.
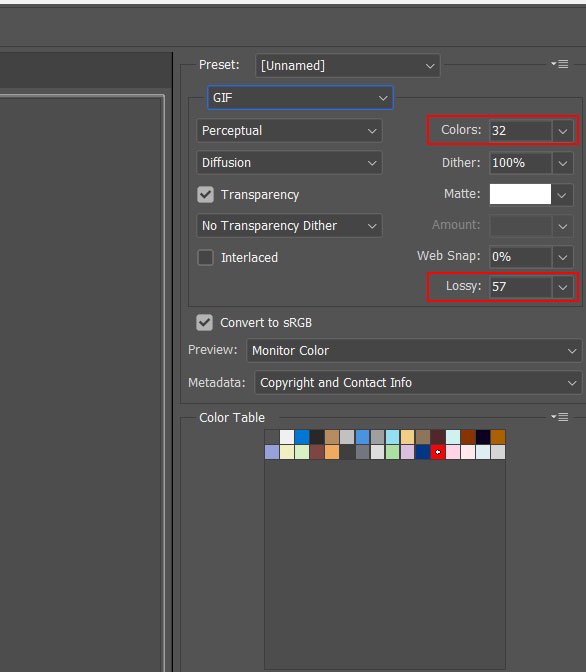
Reducing file size
GIFs can be huge, which impacts loading times. Reduce file size by limiting the number of colors (use GIF options in Save for Web) or lowering the resolution.
Adjusting the frame rate
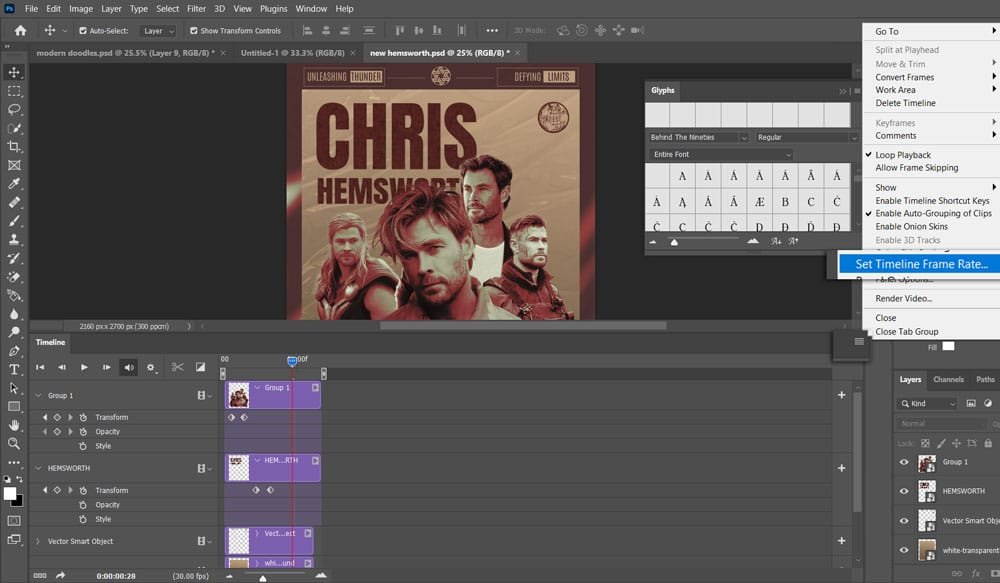
Social media platforms often have size limits for GIFs. Reducing the frame rate can reduce file size without sacrificing too much quality.
Looping options
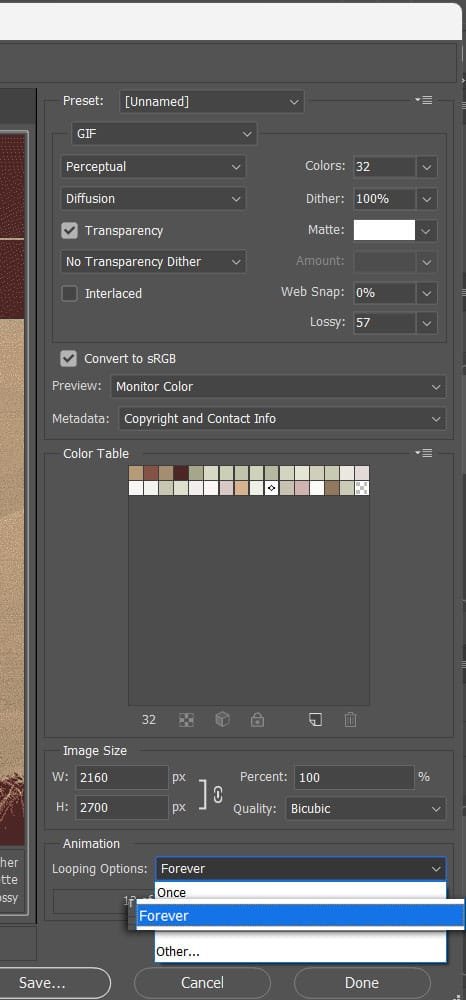
Decide whether your GIF should loop forever or play just once. Continuous loops are great for social media, while single loops may be better for presentations.
Tips and tricks for adding effects and transitions to your GIFs
Adding effects and transitions can take your GIFs to the next level. Here are some tips:
Experiment with layer styles
Use Photoshop’s layer styles (e.g., shadow, glow, bevel) to give your GIF a unique look. These can make elements pop or add a 3D effect.
Use keyframes for smooth motion
Keyframes in the Timeline panel allow you to animate attributes such as opacity, position, and style. This creates smooth transitions between frames.
Adding Motion Blur
Motion blur can be applied to create the illusion of speed or movement. This effect is particularly effective in action GIFs.
Resources to find Photoshop actions and templates for GIF creation
Sometimes, it’s not necessary to start from scratch. Many available resources provide ready-made actions and templates to simplify your GIF creation process.
Graphic River: GraphicRiver is a leading marketplace offering a vast collection of high-quality design assets, including graphics, templates, and add-ons, created by professional designers from around the world.
Creative Market: Buy individual actions and templates created by professional designers.
Why use these resources?
Save time: Actions automate repetitive tasks, speeding up your workflow.
Professional results: Templates provide a great starting point, ensuring high-quality output even if you’re new to Photoshop.
Conclusion
Creating GIFs in Photoshop is a skill that’s not only fun to learn but also incredibly useful in today’s digital age. Whether you’re just starting or want to advance your skills, this guide will give you the basics you need to know to create great GIFs online. By understanding the basics, exploring advanced techniques, and optimizing your work for the web, you’ll be well on your way to mastering GIF creation in Photoshop.
So, grab your images, fire up Photoshop, and start creating your next viral GIF today!
To further enhance your Photoshop skills, don’t miss our comprehensive guide on “Photoshop tutorials” where you’ll find more tips and techniques to elevate your design game.

